
Now Reading: Proxmox Backup Using an External Disk
-
01
Proxmox Backup Using an External Disk
Backing Up to an External Disk in Proxmox and Restoring on Another Server
Purpose
In this guide, we will explain:
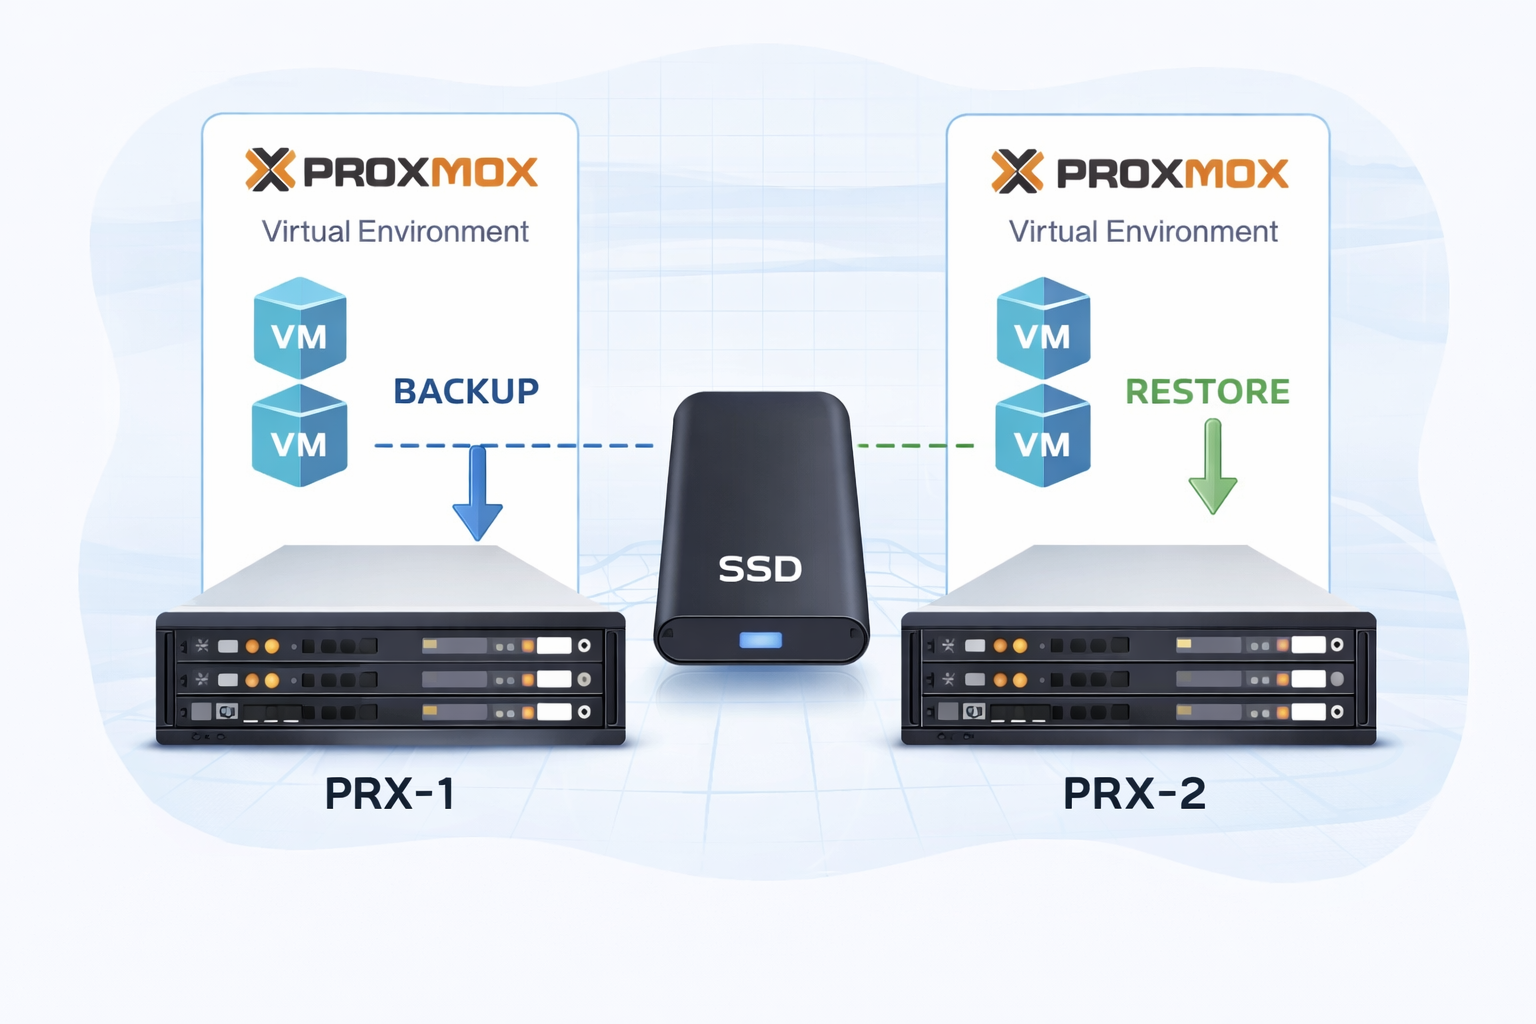
- Backing up to an external SSD on a Proxmox server (PRX-1)
- Safely removing the SSD
- Restoring the backup on another Proxmox server (PRX-2)
We will walk through these steps completely and securely.
This method is especially ideal for:
- Offline migration
- Disaster recovery
- Server migration
- Air-gapped backups
1️⃣ BACKUP PROCESS ON PRX-1
Step 1 – Formatting the External Disk
First, check if the disk is visible to the system:
lsblkThe disk may appear as /dev/sdf or /dev/sdf1.
Format the disk as ext4:
mkfs.ext4 /dev/sdf⚠️ Note: Formatting will erase all data on the disk.
Step 2 – Creating the Mount Directory
mkdir -p /mnt/usbbackupStep 3 – Mounting the Disk
mount /dev/sdf /mnt/usbbackupVerify:
df -h | grep usbbackupStep 4 – Adding the Storage via Proxmox UI
Mounting alone is not sufficient. The disk must also be added as storage in Proxmox.
- Datacenter
- Storage
- Add → Directory
Fill in the fields as follows:
| Field | Value |
|---|---|
| ID | usb-backup |
| Directory | /mnt/usbbackup |
| Content | ✔ VZDump backup file |
| Nodes | PRX-1 |
Step 5 – Taking the Backup
Node → VM → Backup → Backup now
- Storage: usb-backup
- Mode: Snapshot
- Compression: zstd (recommended)
The backup file will be created under:
/mnt/usbbackup/dump/Step 6 – Removing the Storage from Proxmox (IMPORTANT)
Before physically disconnecting the disk:
Datacenter → Storage → usb-backup → Remove
- This does NOT delete the disk.
- It only removes it from Proxmox configuration.
Step 7 – Safely Disconnecting the Disk
sync
umount /mnt/usbbackup
Verify with:
df -hThe disk should no longer appear in the mounted list.
—2️⃣ RESTORE PROCESS ON PRX-2
Step 1 – Connect the External SSD to PRX-2
lsblkStep 2 – Create the Mount Directory
mkdir -p /mnt/usbbackupStep 3 – Mount the Disk
mount /dev/sdf /mnt/usbbackupStep 4 – Add Storage via Proxmox UI
Datacenter → Storage → Add → Directory
| Field | Value |
|---|---|
| ID | usb-backup |
| Directory | /mnt/usbbackup |
| Content | ✔ VZDump backup file |
| Nodes | PRX-2 |
Step 5 – Restore Process
Node → Storage → usb-backup → Select backup file → Restore
- VMID: Same or new ID
- Target Storage: Where VM disks will be stored
Important Notes
✔ Do Not Unmount Before Removing Storage
Otherwise, Proxmox may show “storage not available” errors.
✔ Always Use sync Before Removal
sync✔ ext4 is Recommended
ext4 is the most stable file system for external backup disks.
✔ emergency_ro Error
If you see:
emergency_roThe disk has switched to read-only mode due to filesystem errors. Run fsck to repair it.
—With this method:
- Secure offline backups can be taken
- Manual migration between Proxmox servers is possible
- Disaster recovery scenarios can be implemented
- Air-gapped backups can be maintained
This procedure can be safely applied in production environments.