

Now Reading: How to Fix Connection to Redis Failed
-
01
How to Fix Connection to Redis Failed

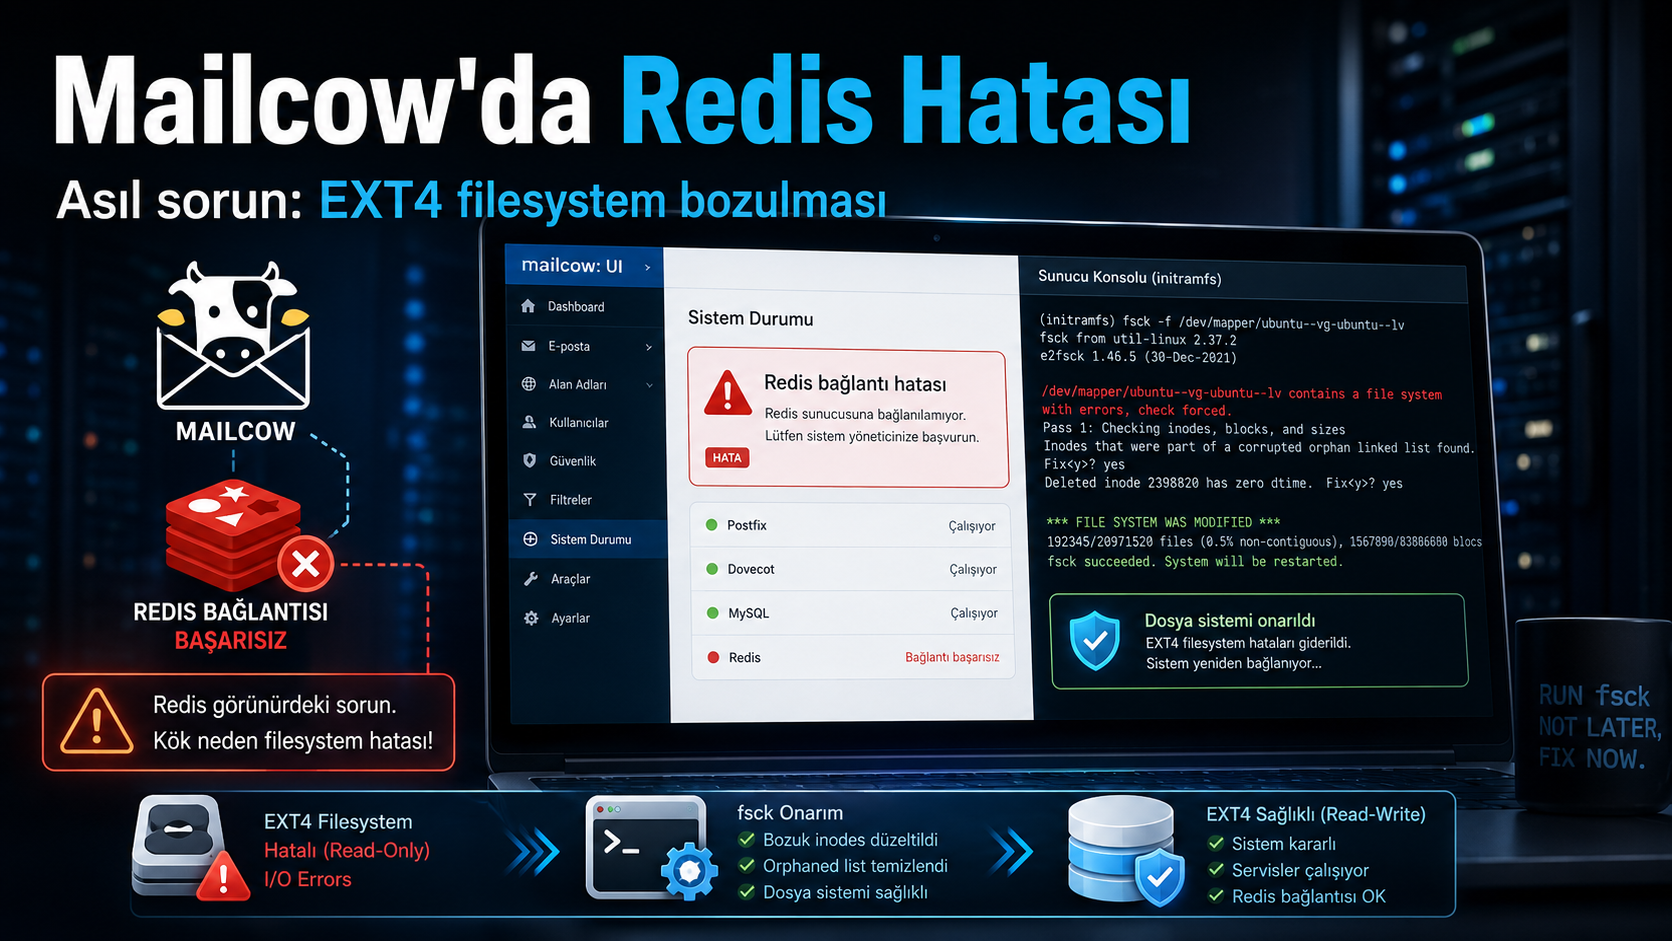
How to Fix “Connection to Redis Failed – Host is Unreachable” in Mailcow
When running Mailcow, you may occasionally encounter the following error:
Connection to Redis failed.

The following error was reported:
Host is unreachable
At first glance, this looks like a Redis problem. However, Redis is not always the actual root cause.
In Docker-based Mailcow environments, this error can also be triggered by Docker networking issues, container runtime problems, DNS failures, or even filesystem corruption on the underlying Linux server.
In this guide, we will walk through a real-world troubleshooting case where a Redis connection error turned out to be caused by an EXT4 filesystem journal failure.
1. Check Mailcow Container Status
First, change to the Mailcow installation directory:
cd /opt/mailcow-dockerized
Then check the status of all containers:
docker compose ps
In our case, the Redis container appeared to be running:
mailcowdockerized-redis-mailcow-1
redis:7.4.6-alpine
Up 5 days
127.0.0.1:7654->6379/tcp
However, some other services were also unhealthy:
clamd-mailcow      unhealthy
unbound-mailcow    unhealthy
This was an important clue.
If only Redis were affected, Redis itself would be the obvious suspect. But when multiple containers start failing at the same time, the problem may exist at a lower layer such as Docker, the filesystem, or the storage subsystem.
2. Test Redis Connectivity
Normally, Redis can be tested with:
docker compose exec redis-mailcow redis-cli PING
Expected result:
PONG
To check whether the PHP-FPM container can resolve the Redis service name:
docker compose exec php-fpm-mailcow getent hosts redis-mailcow
To test network connectivity:
docker compose exec php-fpm-mailcow ping -c 3 redis-mailcow
However, during this test, a more serious error appeared:
failed to create runc console socket:
mkdir /tmp/pty3429788895: read-only file system
At this point, the issue was clearly no longer just Redis.
3. What Does “Read-only File System” Mean?
The following error:
read-only file system
means that Linux is refusing write operations to the affected filesystem.
Docker and containerd continuously write data to locations such as:
/tmp
/var/lib/docker
/var/lib/containerd
If these locations become read-only:
- Docker
execcommands may fail - Redis connectivity may break
- DNS queries may time out
- Containers may become unhealthy
- Logs may stop being written
- Mailcow’s web interface may start showing errors
Therefore, the next step is to verify whether the host filesystem is actually writable.
4. Check the Root Filesystem Mount Status
Run:
mount | grep ' on / '
and:
findmnt /
In our case, the output initially looked normal:
/dev/mapper/ubuntu--vg-ubuntu--lv on / type ext4 (rw,relatime)
The rw flag indicates that the filesystem is mounted as read-write.
However, this output alone is not enough.
A real write test is required.
5. Perform Actual Write Tests
Run the following:
touch /root/write-test
touch /var/write-test
touch /tmp/write-test
touch /var/lib/containerd/write-test
In the affected system, every command failed with:
Read-only file system
This confirmed that the filesystem was effectively read-only, even though the mount output still displayed rw.
6. Check Disk Usage and Inodes
First check disk usage:
df -h
Then check inode usage:
df -i
In our example:
Filesystem                          Size  Used Avail Use%
/dev/mapper/ubuntu--vg-ubuntu--lv    97G   85G  7.2G  93%
Inode usage was only around:
IUse% 8%
The filesystem was 93% full, but inode exhaustion was not the problem.
High disk utilization should still be addressed, but it does not normally explain an immediate read-only remount by itself.
The next step was to inspect the kernel logs.
7. The Critical Diagnostic Command: dmesg
Run:
dmesg -T | grep -Ei 'EXT4|I/O error|Buffer I/O|read-only|readonly|remount|abort|nvme|ata|blk_update'
The system showed errors such as:
EXT4-fs error (device dm-0):
Detected aborted journal
followed by:
EXT4-fs (dm-0):
Remounting filesystem read-only
and:
Journal has aborted
At this point, the root cause was confirmed.
The Mailcow Redis connection failure was actually caused by an EXT4 journal failure.
Linux had automatically remounted the filesystem as read-only to protect it from further corruption.
8. What Is an EXT4 “Aborted Journal”?
EXT4 uses a journaling mechanism to protect filesystem metadata.
Operations such as:
- inode creation
- file deletion
- metadata updates
- directory changes
- block allocation
are tracked through the journal.
If the journal becomes corrupted or aborts, Linux may stop further write operations to protect the filesystem.
Typical messages include:
Detected aborted journal
Journal has aborted
Remounting filesystem read-only
Once this happens, applications that depend on disk writes start failing.
In Docker environments, the impact is usually immediate and widespread.
9. Identify the Disk and Filesystem Layout
Use:
lsblk -o NAME,SIZE,FSTYPE,TYPE,MOUNTPOINTS,MODEL
In our system, the layout was:
sda                         200G
├─sda1                        1M
├─sda2                        2G ext4        /boot
└─sda3                      198G LVM2_member
  └─ubuntu--vg-ubuntu--lv    99G ext4        /
The root filesystem was located on:
/dev/mapper/ubuntu--vg-ubuntu--lv
The server was running as a virtual machine on Proxmox, with the disk presented as:
QEMU HARDDISK
10. Do Not Run fsck on a Mounted Root Filesystem
Do not run:
fsck /dev/mapper/ubuntu--vg-ubuntu--lv
or:
e2fsck -f /dev/mapper/ubuntu--vg-ubuntu--lv
while the root filesystem is actively mounted.
Running fsck on an active filesystem can create additional corruption.
The filesystem must be checked from recovery mode, initramfs, rescue mode, or another environment where the root filesystem is not mounted for normal operation.
11. Boot into Recovery or Initramfs
Shut down the server cleanly:
shutdown -h now
Then start the VM again from the Proxmox console.
If the EXT4 corruption is severe enough, Ubuntu may automatically drop into an initramfs shell.
You may see:
UNEXPECTED INCONSISTENCY; RUN fsck MANUALLY
and:
The root filesystem on
/dev/mapper/ubuntu--vg-ubuntu--lv
requires a manual fsck
followed by:
(initramfs)
This is the correct environment for the repair.
12. Run fsck Manually
From the initramfs prompt, run:
fsck -f /dev/mapper/ubuntu--vg-ubuntu--lv
The tool may detect filesystem inconsistencies and ask questions such as:
Inodes that were part of a corrupted orphan linked list found.
Fix<y>?
Enter:
y
Other prompts may include:
Clear<y>?
Reconnect<y>?
Fix<y>?
If you intend to repair the filesystem, answer:
y
to the appropriate repair prompts.
13. Example fsck Errors
In our real-world case, fsck reported:
Inodes that were part of a corrupted orphan linked list found.
It also repaired entries such as:
Inode 1310954 was part of the orphaned inode list. FIXED.
Another example was:
Deleted inode 2398820 has zero dtime. Fix<y>?
These messages indicate inconsistencies in EXT4 filesystem metadata.
14. Automatic Repair Option
If you want fsck to automatically answer yes to repair prompts:
fsck -fy /dev/mapper/ubuntu--vg-ubuntu--lv
The options mean:
-f
Force a filesystem check.
-y
Automatically answer yes to all repair questions.
On important production systems, it is often preferable to run the first repair interactively so that you can review what is being changed.
15. Run fsck a Second Time
After the first repair, you may see:
FILE SYSTEM WAS MODIFIED
Do not immediately reboot.
Run the filesystem check again:
fsck -f /dev/mapper/ubuntu--vg-ubuntu--lv
The second run should ideally finish without discovering additional errors.
A clean result may look similar to:
clean
The objective is to ensure that the filesystem is internally consistent before booting normally.
16. Reboot the Server
Once the filesystem check completes successfully:
reboot
In some initramfs environments, you can also use:
exit
to continue the boot process.
17. Verify the Filesystem After Boot
Before troubleshooting Mailcow again, first verify that the filesystem is writable.
Run:
touch /tmp/test-after-fsck
and:
touch /root/test-after-fsck
Neither command should return an error.
Then check the mount state:
findmnt /
The filesystem should be mounted read-write.
Also review the kernel logs:
dmesg -T | grep -Ei 'EXT4|I/O error|read-only|aborted journal' | tail -50
There should be no new EXT4 journal errors.
18. Verify Mailcow Containers
Once the filesystem is healthy, return to Mailcow:
cd /opt/mailcow-dockerized
Check container status:
docker compose ps
Then test Redis:
docker compose exec redis-mailcow redis-cli PING
Expected response:
PONG
Check Redis name resolution from PHP-FPM:
docker compose exec php-fpm-mailcow getent hosts redis-mailcow
And test network connectivity:
docker compose exec php-fpm-mailcow ping -c 3 redis-mailcow
19. Recheck Unbound and ClamAV
During the original incident, the following containers were unhealthy:
clamd-mailcow      unhealthy
unbound-mailcow    unhealthy
After repairing the filesystem, check again:
docker compose ps
If necessary, inspect logs:
docker compose logs --tail=100 unbound-mailcow
and:
docker compose logs --tail=100 clamd-mailcow
20. Check Docker and containerd
Verify Docker:
systemctl status docker
Verify containerd:
systemctl status containerd
Check the logs:
journalctl -u docker -n 100 --no-pager
journalctl -u containerd -n 100 --no-pager
Make sure you no longer see errors such as:
read-only file system
21. Address High Disk Usage
After the filesystem repair, disk utilization should also be reviewed.
In our case, the root logical volume was approximately:
97 GB
with:
85 GB used
93% usage
However, the VM itself had a:
200 GB
virtual disk.
The root logical volume was only around:
99 GB
This means there may be unused space inside the LVM volume group.
Check with:
pvs
vgs
lvs
If free space is available, the root volume may be expanded.
For example:
lvextend -l +100%FREE /dev/ubuntu-vg/ubuntu-lv
Then resize the EXT4 filesystem:
resize2fs /dev/ubuntu-vg/ubuntu-lv
Always verify the LVM layout before performing these commands.
22. Possible Causes of EXT4 Journal Corruption
EXT4 journal corruption can be caused by several underlying issues:
- Sudden power loss
- Forced VM shutdown
- Hypervisor reset
- Temporary storage disconnection
- Physical disk failure
- SAN or NAS connectivity problems
- RAID controller issues
- Kernel or storage driver problems
- Filesystem becoming completely full
- Host node crash
- QEMU I/O problems
Because of this, fsck should not be considered the end of the investigation.
The underlying storage issue should also be identified.
23. Checks to Perform on Proxmox
If the Mailcow VM runs on Proxmox, also inspect the Proxmox host.
Check for disk and I/O errors:
dmesg -T | grep -Ei 'I/O|error|disk|nvme|ata|reset'
Review kernel logs:
journalctl -k
Check storage status:
pvesm status
If you use ZFS:
zpool status
If a hardware RAID controller is involved, review the RAID controller health and event logs as well.
24. Important Warnings
If the filesystem has been remounted read-only, avoid running commands such as:
docker system prune
docker compose down
docker compose pull
apt upgrade
You should also avoid forcing the filesystem back into read-write mode with:
mount -o remount,rw /
when the EXT4 journal is already corrupted.
The filesystem should be repaired first with fsck.
Conclusion
The following Mailcow error:
Connection to Redis failed
Host is unreachable
does not always mean that Redis itself is broken.
In this case, the real root cause was:
EXT4 journal corruption
Linux detected the filesystem problem and remounted the root filesystem as:
read-only
This triggered a chain reaction affecting:
- Redis
- Docker exec operations
- Unbound DNS queries
- container health checks
- system logging
- Mailcow’s web interface
The filesystem was repaired using:
fsck -f /dev/mapper/ubuntu--vg-ubuntu--lv
which corrected corrupted inode and journal metadata.
The key lesson is simple:
When several Docker services fail at the same time, do not troubleshoot only at the application level.
Always think in layers:
Application
   ↓
Docker / Containerd
   ↓
Linux Filesystem / Storage
A Redis error at the top of the stack may actually be caused by a filesystem or storage failure at the bottom.